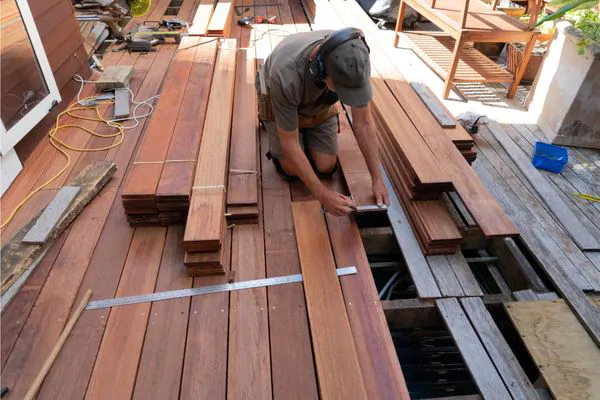
Is your old deck falling apart? You might need deck demolition in Thornton. Many homeowners face this problem when their decks rot or become unsafe. Removing a deck can be a big job, but it’s often needed for safety.
Did you know deck removal costs can range from $600 to $1,000 for small ground-level decks? This price can change based on the size and type of your deck. Our guide will walk you through the steps of deck demolition.
We’ll cover permits, safety gear, and removal methods. Ready to learn how to tear down your deck?
Key Takeaways
- Deck demolition in Thornton costs $600 to $1,000 for small ground-level decks.
- Get permits before starting deck removal to avoid fines and legal issues.
- Wear safety gear like gloves, glasses, and sturdy shoes during demolition.
- Remove railings and deck boards first, then tackle stairs and support structures.
- Bad deck construction signs include rotting wood, loose railings, and unstable supports.
Preparing for Deck Demolition
Deck demolition needs careful planning. Safety gear and proper tools are crucial for a smooth removal process.
Obtain necessary permits
Before starting deck demolition, check local laws about permits. Many areas require them, especially for historic properties. Failing to get permits can lead to fines or legal issues.
Contact your local building department to learn what’s needed. They’ll explain the process and any fees involved. Getting proper permits ensures your project follows safety rules and building codes.
Permits protect you and your neighbors during demolition. They make sure the work is done safely and correctly. Some contractors may handle permits for you, but always confirm who’s responsible.
Don’t skip this step, even if it seems like extra work. It’s a key part of a smooth, legal deck removal project.
Safety equipment and precautions
After getting permits, safety becomes the top concern. Proper gear and caution protect you during deck demolition. Here’s a list of essential safety equipment and precautions:
- Protective Gear:
- Long pants and sleeves shield skin from splinters and debris
- Sturdy shoes with non-slip soles prevent falls
- Heavy-duty gloves guard hands from cuts and scrapes
- Safety glasses shield eyes from flying particles
- Ear protection blocks loud noises from power tools
- Work Area Safety:
- Clear the deck of loose items and furniture
- Set up barriers to keep others away from the work zone
- Check for power lines or utilities near the deck
- Ensure stable footing by removing any slippery substances
- Tool Safety:
- Inspect all tools before use
- Keep power cords away from cutting areas
- Use tools as intended and avoid makeshift solutions
- Turn off and unplug tools when not in use
- Structural Safety:
- Check for deck stability before starting work
- Start demolition from the top down
- Work from the ground when possible to avoid falls
- Be aware of nail locations to prevent punctures
- Debris Management:
- Use a dumpster for safe waste disposal
- Keep the work area clean to prevent tripping hazards
- Sort materials for recycling if possible
- Health Precautions:
- Stay hydrated, especially in hot weather
- Take breaks to avoid fatigue
- Be aware of your physical limits and ask for help when needed
- Emergency Preparedness:
- Have a first aid kit on hand
- Keep a phone nearby for emergencies
- Know the location of the nearest hospital
Step-by-Step Deck Removal Process
Deck removal needs a clear plan and the right tools. You’ll start by taking off railings and deck boards, then move on to stairs and support structures.
Dismantle railings and deck boards
Start your deck demolition by removing railings and deck boards. Use caution with power tools to take off balusters and the top rail first. Then, pry up deck boards with a crowbar or pry bar.
Work from one end to the other, checking for nails or screws as you go. Save any good wood for reuse or sale. Always wear safety gear like gloves and goggles during this step. Plan your approach carefully to ensure a smooth and safe removal process.
Remove stairs and support structures
Removing deck stairs and support structures requires careful planning. Start by detaching the stair treads and risers from the stringers. Use a pry bar to lift each board, then remove nails or screws.
Next, address the stringers. Cut them into smaller pieces with a reciprocating saw for easier handling. For support structures, work from top to bottom. Remove joists, beams, and posts in that order.
Always wear safety gear like glasses, gloves, and sturdy boots during this process.
Safety is crucial when removing stairs and supports. Keep a first aid kit nearby in case of accidents. Consider hiring a professional if you’re unsure about doing it yourself. They have the appropriate tools and expertise to remove decks safely.
Be aware that falling hazards increase as you dismantle the deck. Work carefully and watch your step. Clear away debris as you go to avoid tripping. With proper care, you can remove your deck stairs and supports safely.
Dispose of old materials responsibly
After removing stairs and support structures, you must deal with the leftover materials. Proper disposal of old deck parts is crucial. Burning wood decks can release harmful chemicals and may be illegal.
Instead, rent a dumpster for the safe removal of debris. This method ensures compliance with local rules and protects the environment.
Professional help can make disposal easier and safer. Experts know how to handle treated wood and other materials correctly. They can also recycle usable parts, reducing waste. Planning ahead for disposal saves time and prevents issues later.
Responsible removal of old deck materials is a key step in your project’s success.
Bad Deck Construction: Recognizing When to Demolish
Bad deck construction poses serious safety risks. Homeowners must spot signs of poor building early to avoid accidents. Rotting wood, loose railings, and unstable support structures signal the need for demolition.
These issues often result from using low-quality materials or skipping vital steps during installation. Seasonal elements in Colorado can speed up deck deterioration, making repairs ineffective.
Safety concerns top the list of reasons to demolish a deck. A professional inspection can reveal hidden problems that make the structure unsafe. Qualified experts assess the deck’s condition and recommend the best course of action.
They check for proper fasteners, secure connections, and sound footings. If these elements fail, it’s time to remove the old deck and start fresh. Planning ahead ensures a smooth demolition process and paves the way for a safer, more enjoyable outdoor space.
Repairing vs. Replacing Your Deck: Making the Right Choice
Deck repairs often fall short after about ten years. Safety issues and upgrade desires push many homeowners to replace their decks. A new deck offers fresh design options and improved safety features.
Repairs may not fix deep-rooted problems, making replacement the smarter choice. Homeowners should weigh the costs and benefits of both options carefully.
Replacing a deck allows for modern materials and updated building codes. This can boost home value and reduce future maintenance needs. Old decks with rotting wood or unstable structures need full replacement for safety.
A professional inspection can help decide between repair and replacement. Consider your long-term plans and budget when making this important choice.
Post-Demolition Site Preparation
After demolition, you’ll need to clean up and prep the site. This step sets the stage for new construction or landscaping projects.
Site cleanup and preparation for new construction
After deck demolition, site cleanup is crucial. Remove all debris, nails, and screws from the area. Rake the ground to find hidden hazards. A clean site prevents injuries and preps for new construction.
Next, assess the ground where the old deck stood. Level uneven spots and fill holes. This creates a stable base for your new project. Planning ahead helps you build a better outdoor space.
Proper site prep leads to a smoother building process for your new deck.
Incorporating Landscape and Deck Design into Your New Project
After deck demolition, plan your new outdoor space carefully. Mix landscape and deck design for a great look. Use old deck wood for garden features or new deck parts. Think about fire rules when using old wood.
Pick plants that go well with your new deck style. Plan for good drainage to keep your new deck and plants healthy. Working with one contractor for both jobs can make the whole process smoother.
Conclusion
Deck removal in Thornton can be a significant project. With the proper equipment and expertise, you can handle it on your own. Be sure to review local regulations and prioritize safety.
Once your old deck is removed, you’ll have a blank slate. You’ll find numerous possibilities to design a new outdoor area you’ll enjoy.
FAQs
1. How much does professional deck removal cost in Thornton?
Professional deck removal in Thornton typically costs around $15 per square foot. Factors like deck size, materials, and disposal fees affect the final price. Get quotes from local contractors for accurate pricing.
2. What tools do I need for DIY deck demolition?
Essential tools for DIY deck demolition include:
– Reciprocating saw
– Sledgehammer
– Pry bar
– Drill
– Safety gear (gloves, goggles, dust mask)
– Dumpster rental for debris disposal
3. Is a permit required to remove a deck in Thornton?
Check with Thornton’s building department about permit requirements for deck removal. Some areas need permits for structures over a certain size. Obtaining proper permits ensures you follow local regulations.
4. How do I safely demolish my old wood deck?
To safely demolish your old wood deck:
1. Remove railings and balusters
2. Take off deck boards
3. Remove joists and beams
4. Detach the ledger board from the house
5. Remove support posts
6. Dispose of debris properly
Always work with a partner and use proper safety gear.
5. Can I reuse any parts of my old deck?
You might salvage some parts if they’re in good condition:
– Deck boards for smaller projects
– Hardware like screws and bolts
– Support beams for other structures
– Railings for fencing or garden features
Inspect wood carefully for rot or damage before reusing.
6. How long does deck removal usually take?
Deck removal time depends on size and complexity. A small to medium deck might take 1-2 days for DIY removal. Larger decks or those with concrete footings may need 3-5 days. Professional crews can often complete the job faster.


